The versions of a smartphone supporting stable connection to JINS MEME ES_R are limited to Android 5 or iOS 7. This is because MEME's connection interval (7.5 ms) is not in the regulated range. Google has not provided any documentations but Apple has stated the connection parameter request is rejected if it does not comply with rules (p. 111 in Accessory Design Guidelines).
For instance, the data stream stops after 20 seconds on the latest version of Android. However, I identified in which files does Android define the intervals, and modifying the parameters manually worked well for the connection. This blog post explains how to build a custom Android which supports such a fast and stable BLE connection.
TL;DR: my prebuilt images of Android 8.1 for Nexus 5X (557 MB) and Android 10 for Pixel 3a (837 MB) are also available. If you have these devices, install them by following the procedures from Step 6.
Warning: Flashing an operating system of your phone deletes all data and voids a warranty. It can leave the device in an irrecoverable state. Please proceed it at your own risk.
Requirements
- Google reference devices (Nexus or Pixel)
- Ubuntu with at least 250GB of free disk space
- Find details on Android Open Source Project website.
- I used AWS EC2 t2.2xlarge (8 core CPU and 32 memories).
1. Install packages
$ sudo apt-get update -y; sudo apt-get upgrade -y
$ sudo apt-get install -y openjdk-8-jdk python git-core gnupg flex bison gperf build-essential zip curl zlib1g-dev gcc-multilib g++-multilib libc6-dev-i386 lib32ncurses5-dev x11proto-core-dev libx11-dev lib32z-dev ccache libgl1-mesa-dev libxml2-utils xsltproc unzip
2. Fetch source codes of Android OS
After installing required packages, download source codes from Android Open Source Project and checkout codes to a specific version. Repo (git wrapper) is required for the procedures. The tag name "android-8.1.0_r52" can be changed to the version which you want to install. A list of tags supporting each device is available here. An argument "-j8" depends on the number of CPUs. You can check the number by "$ nproc". It should be "-j4" if there are four cores.
$ mkdir ~/bin
$ echo "export PATH=$HOME/bin:$PATH" >> ~/.bashrc
$ source ~/.bashrc

$ curl https://storage.googleapis.com/git-repo-downloads/repo > ~/bin/repo
$ chmod u+x ~/bin/repo

$ mkdir ~/android-src
$ cd ~/android-src

$ repo init -u https://android.googlesource.com/platform/manifest -b android-8.1.0_r52
$ repo sync -j8
# This process took 30 minutes on t2.2xlarge.
3. Edit codes related to BLE connection interval
The acceptable connection interval is defined in two files. Modify them with your favorite editor.
$ vim ~/android-src/packages/apps/Bluetooth/res/values/config.xml
- <integer name="gatt_high_priority_min_interval">9</integer>
+ <integer name="gatt_high_priority_min_interval">6</integer>

$ vim ~/android-src/system/bt/stack/include/btm_ble_api_types.h
- #define BTM_BLE_CONN_INT_MIN_LIMIT 0x0009
+ #define BTM_BLE_CONN_INT_MIN_LIMIT 0x0006
4. Copy proprietary binaries
Some hardware specific proprietary codes are not open sourced. I tested building Android OS without them and found that a phone works. But involving them improves the performance. Find correct binaries from this link and put them to the root directory of the project as "vendor".
$ mkdir ~/android-vendor-binaries
$ cd ~/android-vendor-binaries

$ wget https://dl.google.com/dl/android/aosp/lge-bullhead-opm7.181205.001-bb4176a6.tgz
$ tar -xzvf lge-bullhead-opm7.181205.001-bb4176a6.tgz
$ ./extract-lge-bullhead.sh

$ wget https://dl.google.com/dl/android/aosp/qcom-bullhead-opm7.181205.001-89810045.tgz
$ tar -xzvf qcom-bullhead-opm7.181205.001-89810045.tgz
$ ./extract-qcom-bullhead.sh

$ cp -r vendor ~/android-src/
5. Build
$ cd ~/android-src
$ make clobber
$ source build/envsetup.sh
$ lunch
# Select the name of your target device (Nexus 5X: aosp_bullhead-userdebug).
# https://developers.google.com/android/images

$ make -j8
# This process took 4 hours on t2.2xlarge.
OS images will be exported to ~/android-src/out/target/product/TARGET_DEVICE/. Copy them to a directory easy to be found.
$ mkdir ~/android-dist
$ cp ~/android-src/out/target/product/bullhead/*.img ~/android-dist/
6. Unlock oem lock and flash Android OS
Overwrite OS images by using Android Platform-Tools.
$ adb reboot bootloader
$ fastboot flashing unlock

$ cd ~/android-dist
$ export ANDROID_PRODUCT_OUT=`pwd`; fastboot flashall -w

# ...or flash images manually.
# $ fastboot flash boot boot.img
# $ fastboot flash system system.img
# $ fastboot flash userdata userdata.img
# $ fastboot flash vendor vendor.img
7. Test BLE connection
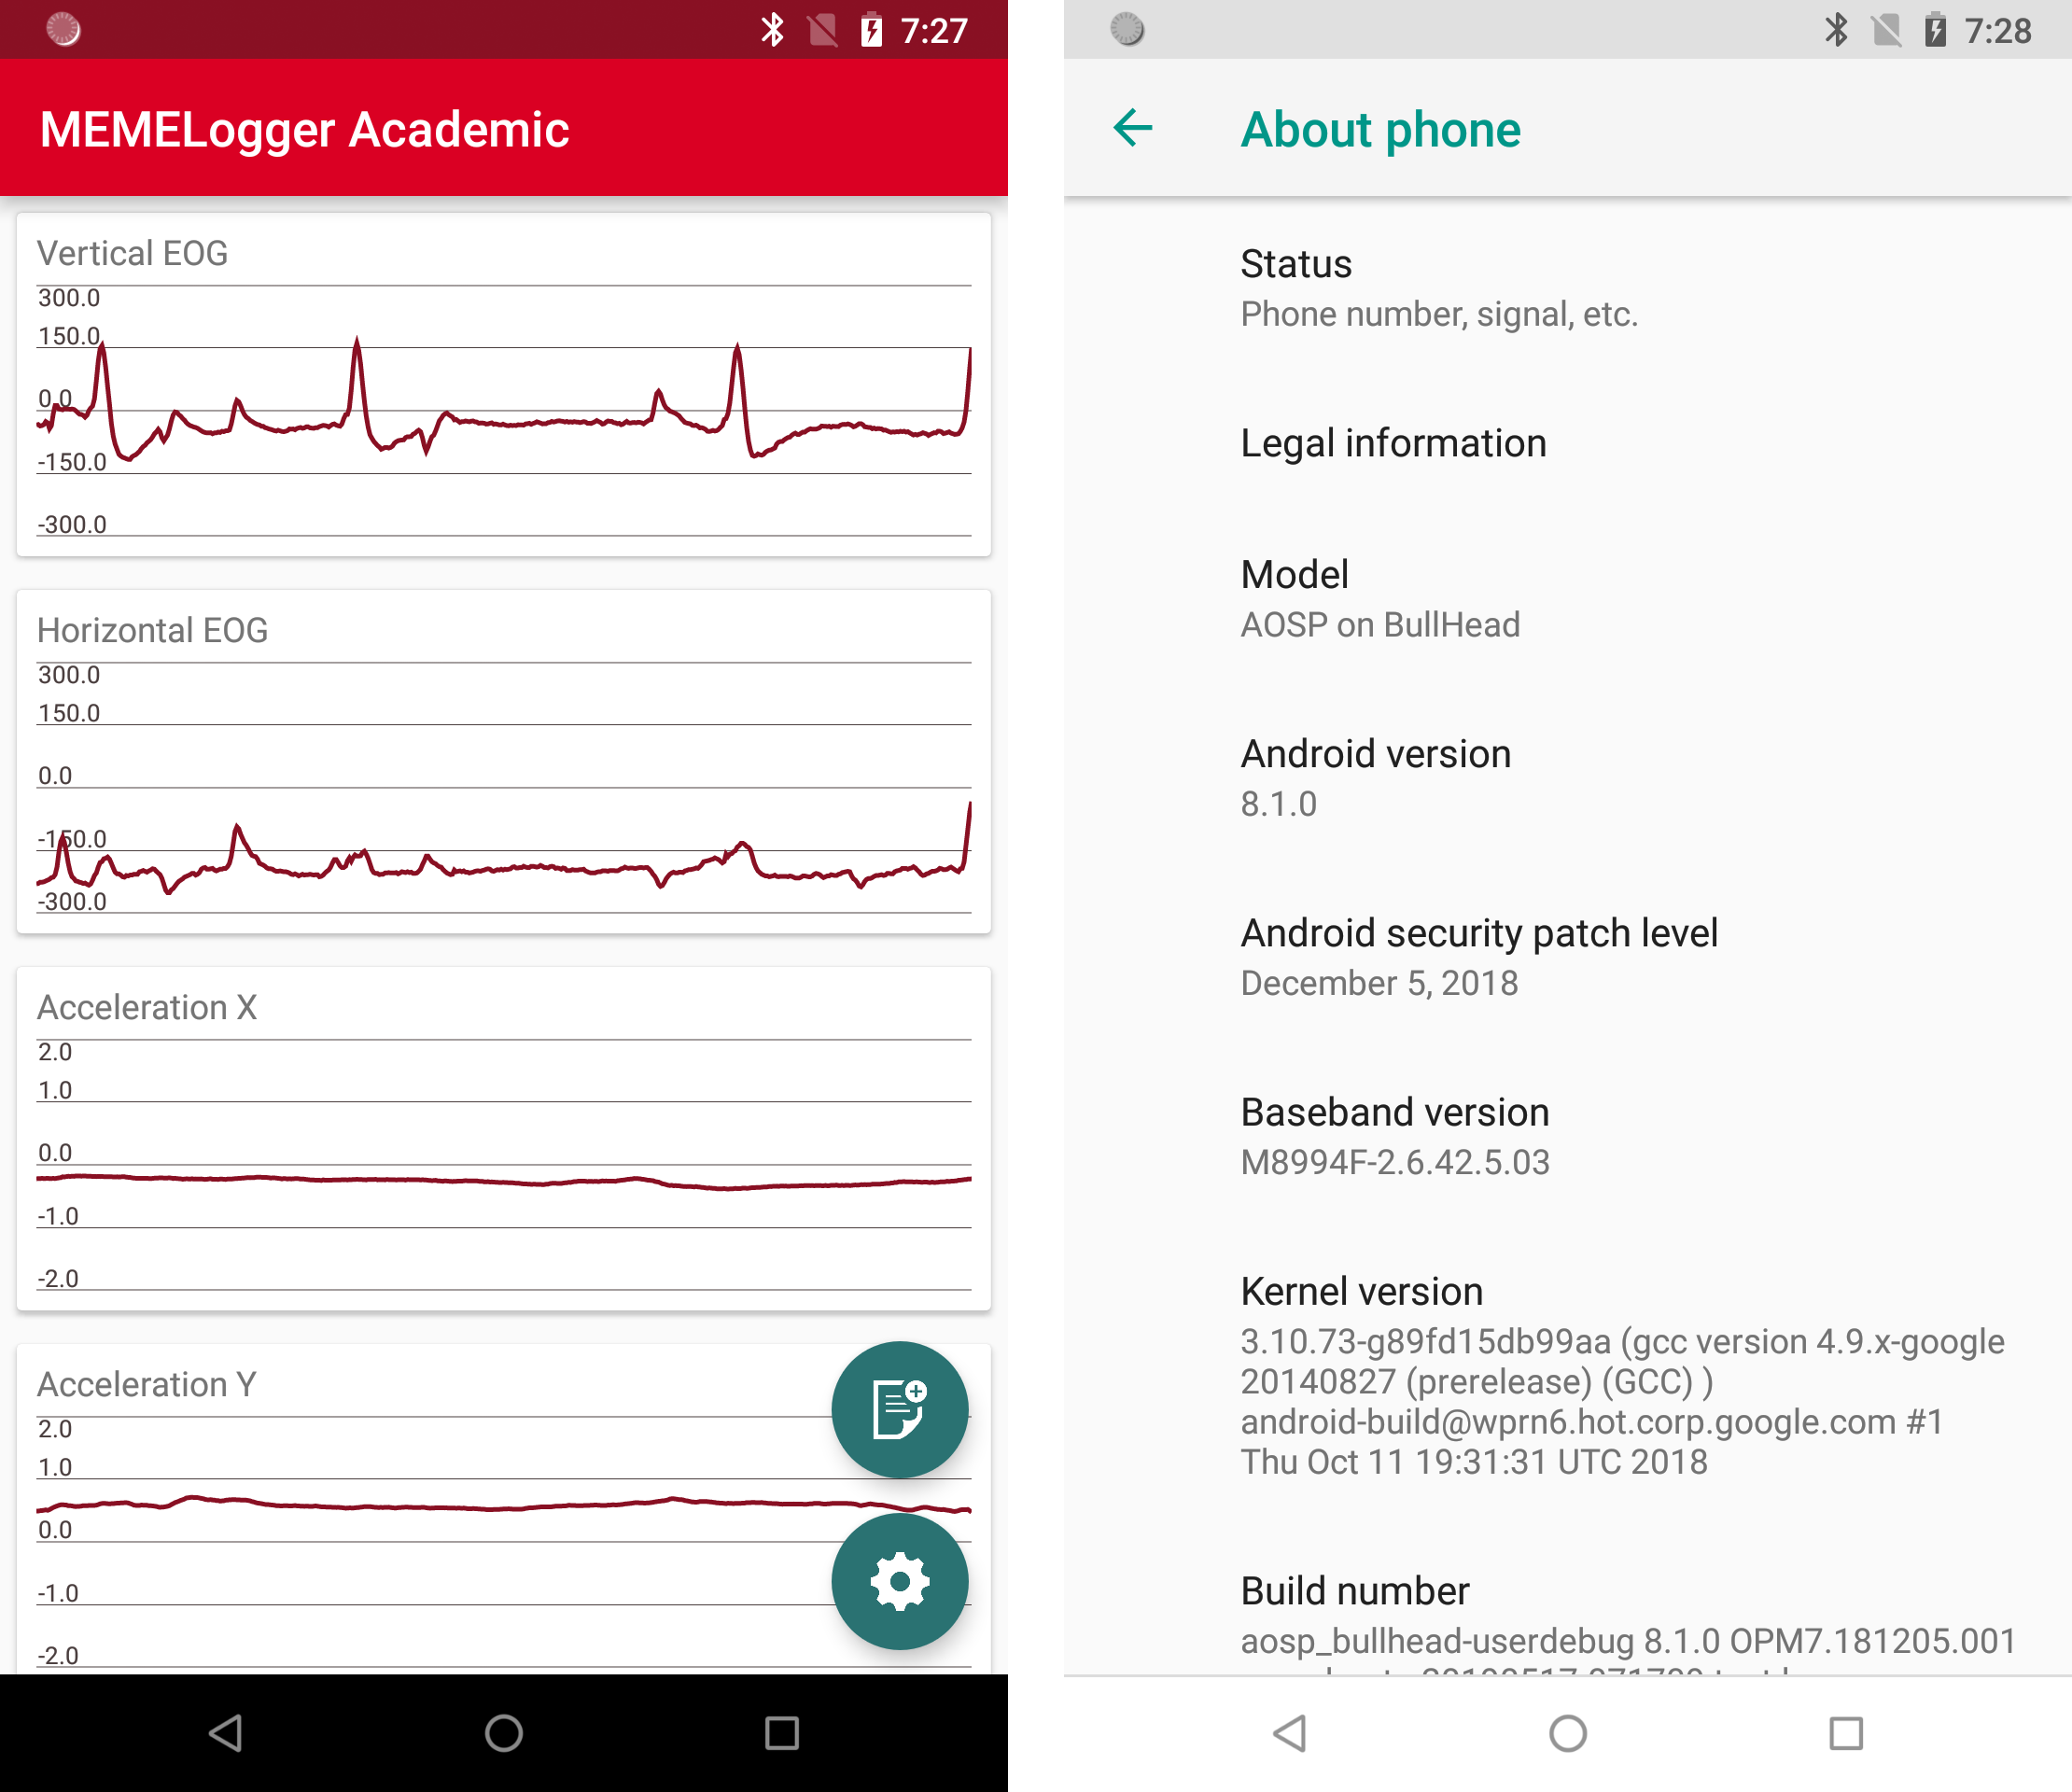
Install Official DataLogger or MEMELogger (my unofficial data logging application) for testing the stable BLE connection. Installing from an apk image may be the easiest way because the open source Android OS doesn't include Google Play App. Here are sample commands to download and install MEMELogger on a terminal.
$ wget https://www.dropbox.com/s/msaanrd8hjmcw3a/memelogger-academic-v0.6.0.apk
$ adb install memelogger-academic-v0.6.0.apk
If everything works well, data will be streamed for more than 20 seconds.